“Let’s take a look at a basic Hololens project. We’ll get it setup in Unity with the Hololens MixedRealityToolkit, and add some basic pointer interaction with the IMixedRealityPointerHandler.”
Overview
If you’re new to Mixed Reality development, getting setup and building your first project with Hololens MixedRealityToolkit might be a little confusing, especially if you’ve been wading through some older articles and realized the framework has been rearranged a bit and doesn’t exactly match what you might be looking at on your own PC.
In this article, we’re going to walk through the basic process of getting your first Hololens app off the ground. We’ll take a look at the Windows MixedReality Toolkit, how to setup your first scene, and walk you through some basic object interaction. By the time we’re done, you may not have the next best selling app but at least you’ll have a better idea on how to get started.
Some things you’ll need:
- A decent Windows 10 PC
- Some basic knowledge of Unity 2019
- Visual Studio 2017 or later with the Universal Windows Platform (UWP)
- The Windows MixedReality Toolkit (MRTK) found here
Let’s go!
MixedRealityToolkit
The first thing we’ll do, before jumping into any applications or code, is navigate over to the MRTK release page and grab the latest Unity packages and stick them somewhere safe.
You can find them below:
- Go to the MRTK release page.
- Under Releases, find a link to the MRTK v2.0 or later and download both the Microsoft.MixedRealityToolkit.Unity.Examples.unitypackage and Microsoft.MixedRealityToolkit.Unity.Foundation.unitypackage
Now that we have these packages safely stored somewhere, let’s take a minute and check out some of the reference material found on Microsoft’s site here:
https://microsoft.github.io/MixedRealityToolkit-Unity/Documentation/GettingStartedWithTheMRTK.html
If you scroll down to the bottom of the page, you’ll notice a section called “Building Blocks for UI and Interactions.” If you’re interested in diving deeper into the toolkit, this is a great place to start. We’re going to skip over this a bit to jump in and get our scene setup, but feel free to come back to this later.
Unity Setup
Next, we’re going to jump into Unity and get our project created. If you’ve never used Unity before, Unity is a real-time 3D development platform used pretty heavily in the Mobile, VR, and AR space. This article isn’t going to go into the details of the Unity platform but it’s worth taking a look at later.
Let’s go ahead and create a Unity project. Open up Unity follow the basic steps to creating a new 3D project. Enter your project name, and specify a location:
MRTK Packages and Mixed Reality Settings
After you have your project set-up, let’s install the packages we downloaded from the Microsoft site:


Once installed, you may get a pop up warning you that MRTK needs to set-up you’re project for building Mixed Reality. :

Go ahead and accept. Basically, MRTK is setting up your project by doing the following:
- Enabling XR Settings for your current platform (enabling the XR checkbox).
- Forcing Text Serialization / Visible Meta files (recommended for Unity projects using source control).
Now that all this is done, let’s open up the settings and make sure we have the Windows Project output specified in our Unity Build settings by doing the following:
- Open menu : File > Build Settings
- Select Universal Windows Platform in the Platform list
- Click on the Switch Platform button


Great! If you’ve made it this far, you’re about half way there. The next thing we’ll do is create our test scene in Unity. To do this: Select File -> New Scene and give it a name
Creating a Scene

You may be prompted that there’s no current mixed reality toolkit in your scene and need to add one. If so, once the dialog appears:
- Click the little circle next to the “None (Mixed Reality Toolkit Configuration Profile”
- Select the toolkit when prompted.
- Select “Yes”

Once you confirm the prompt, MRTK will be added to your scene and you should be able to click on the “Main Camera” under the “MixedRealityPlayspace” to see how things are setup and what’s in view. This is where your head and eyes will be when viewing the MR scene. Make sure you don’t move it. It needs to start at its 0,0,0 axis in order for everything to work properly.

In order to start adding some basic interaction, we’re going to add a cube to the scene. To do so, head up to:
- GameObject->
- 3D Object->
- Cube

And you should see a cube drop into the frame.
Next, you’ll want to move the cube a little away from the Camera. Go ahead and open up the “MixedRealityPlayspace” option in your menu and select the camera to see what it’s looking at. Once you have a general idea of its direction, select the cube and move it away from the camera a bit using the blue arrow handle. If you’ve done everything right, the camera should be in the middle of the scene with the cube slightly away from it. You should be able to see the cube in the “Camera Preview” window as well.


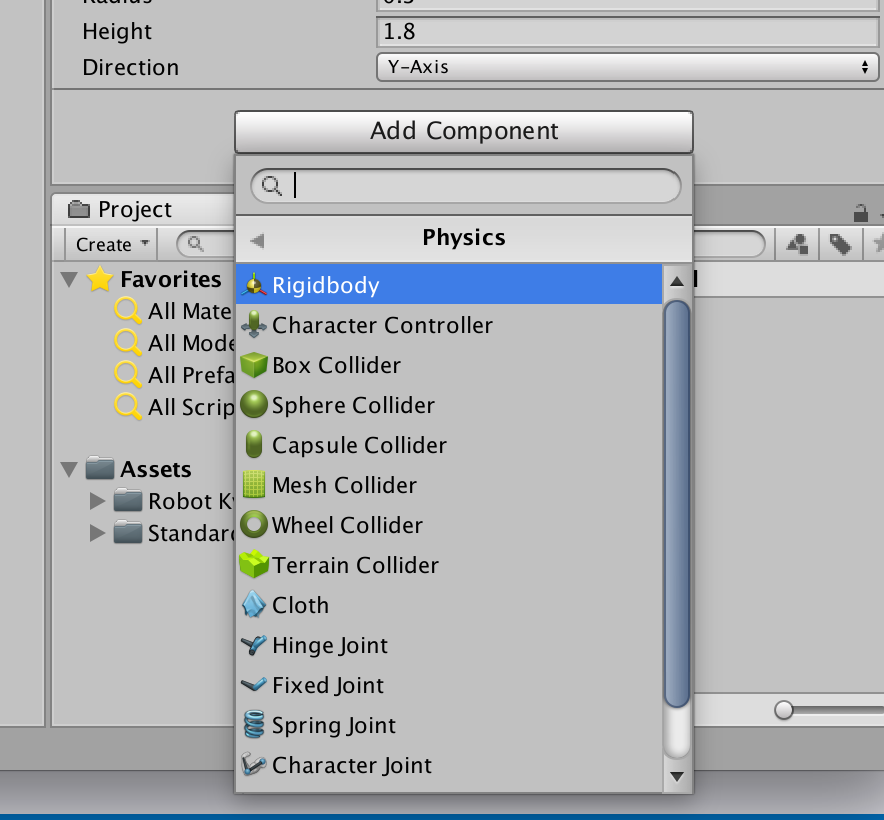
Finally, let’s add a rigidbody component to the cube and uncheck the “Gravity” option for now. We’ll use this later in our example.
To do this, select “Add component” in the sidebar and type in “RigidBody” and select it.

Once added, scroll up and click the “gravity” option.

Visual Studio and adding Interaction
Now, let’s add some actual code. Click on the cube, and select “Add Component” again in the sidebar to add a script.

Give your script a name and open it up in Visual Studio. Once VS launches, you should see code that looks like:
using System.Collections;
using System.Collections.Generic;
using UnityEngine;

public class boxinteraction : MonoBehaviour
{
    // Start is called before the first frame update
    void Start()
    {

    }

    // Update is called once per frame
    void Update()
    {

    }
}
The first thing we’ll do is import the MRTK input library so we can add some interaction. We’ll do this by adding the following line to the top of our code:
using Microsoft.MixedReality.Toolkit.Input;Next, we’ll add a Pointer interface to our class and create the methods we’ll use to interact with the cube. These should be added after the “MonoBehavior” reference next to the class name:
public class boxinteraction : MonoBehaviour, IMixedRealityPointerHandlerOnce the interface is added, it may be underlined in red. This means that the class is missing the necessary methods needed to fully implement the interface. To fix this, click on the underlined class and hit Alt+Enter, this will bring up a dialog with options to implement the interface and add the methods needed. They should then appear in your class.
Now your code should look like the code below:
using Microsoft.MixedReality.Toolkit.Input;
using System.Collections;
using System.Collections.Generic;
using UnityEngine;

public class boxinteraction : MonoBehaviour, IMixedRealityPointerHandler
{
	public void OnPointerClicked(MixedRealityPointerEventData eventData)
	{
    	throw new System.NotImplementedException();
	}

	public void OnPointerDown(MixedRealityPointerEventData eventData)
	{
    	throw new System.NotImplementedException();
	}

	public void OnPointerDragged(MixedRealityPointerEventData eventData)
	{
    	throw new System.NotImplementedException();
	}

	public void OnPointerUp(MixedRealityPointerEventData eventData)
	{
    	throw new System.NotImplementedException();
	}

	// Start is called before the first frame update
	void Start()
	{

	}

	// Update is called once per frame
	void Update()
	{

	}
}
Now, to get some interaction into our AR project we’ll add some basic functionality to the OnPointerDown handler to turn on gravity when the cube is selected in the Mixed Reality space. Let’s add some code to access the Rigidbody component we added earlier and switch on the gravity when it is interacted with.
public void OnPointerDown(MixedRealityPointerEventData eventData)
{
    var rigidBody = GetComponent<Rigidbody>();
    rigidBody.useGravity = true;
}
Great. Now, let’s test out our code.
Testing and Wrap-Up
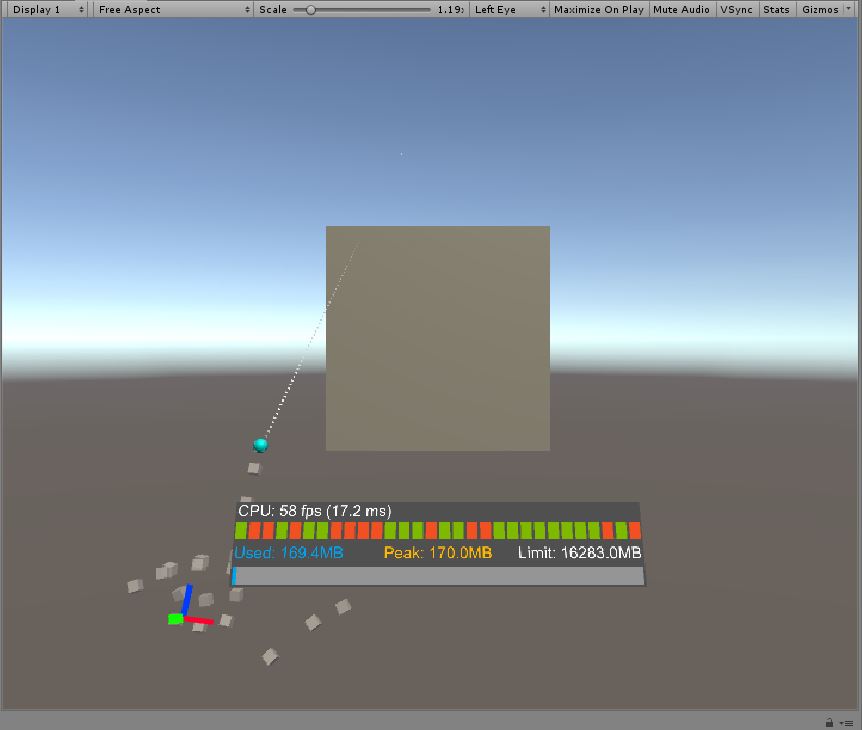
Heading back over to Unity, hit the “Play” button to see our scene in action. To simulate a hand in AR, click on “Shift” while moving the mouse and use the mouse button to simulate a click.

Point the hand over at the cube and click the mouse. If you did everything correct, the gravity should turn on and you should see the cube fall on interaction.
And that’s it! Bam! You just created your first AR project and added an interaction. In the next tutorial, we’ll walk through getting the project out of Unity and into the Hololens for some real life testing. Good luck!


